Learn how to use Adobe Podcast for easy recording, editing, enhancing speech, and publishing. Perfect for beginners and pros alike.
Introduction
What is Adobe Podcast?
For podcasters, content producers, and marketers, Adobe Podcast is a cutting-edge online audio recording and editing tool. If you’re someone who wants to produce studio-quality audio without complex tools, Adobe Podcast is for you. It uses AI-powered tools like Enhanced Speech to automatically improve your audio. As a podcaster, I found it incredibly helpful for reducing noise and making my voice sound professional.
Why Use Adobe Podcast for Audio Content?
You should use Adobe Podcast if you’re serious about audio content creation. With features like text-based editing, automatic transcription, and audio enhancement, you can produce polished episodes quickly. Whether you’re a beginner or a seasoned podcaster, Adobe Podcast saves you time and effort. I love how easy it is to clean up my recordings.
Who Can Benefit from Adobe Podcast?
If you’re a digital marketer, educator, content creator, YouTuber, or freelancer, Adobe Podcast can benefit you. It’s especially great for those looking to start podcasting without expensive gear. From my experience, even if you have basic equipment, Adobe Podcast helps you sound like a pro.
Getting Started with Adobe Podcast
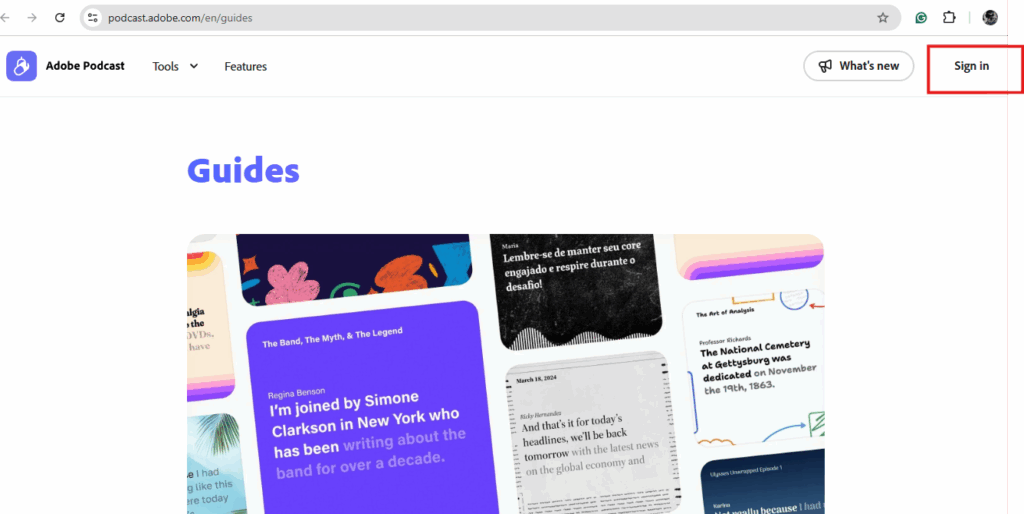
How to Create an Adobe Account
To start, you’ll need an Adobe account. Visit podcast.adobe.com, sign up using your email, and verify it. I remember it took me just 2 minutes to get started. Once you’re in, you can access the main dashboard where all the magic begins. Creating an account is the first step in your podcasting journey. Without it, you can’t access the tools. You’ll appreciate how quick and simple it is.
Navigating the Adobe Podcast Dashboard
After signing in, you’ll see a clean and simple dashboard. You can create new projects, access your recordings, and use tools like Enhance Speech. I liked how user-friendly the interface was. You’ll get used to it within minutes. The dashboard shows everything at a glance. You’ll always find what you need right away. Adobe made sure it’s beginner-friendly.

System Requirements for Smooth Use
For the best experience, you should use a modern browser like Chrome and have a stable internet connection. Verify the compatibility of your headphones and microphone Adobe Podcast works great on most laptops and doesn’t require installation, which I really appreciate. Adobe Podcast is lightweight and browser-based. You won’t face lag or compatibility issues. It’s ideal for beginners and pros alike.
Recording Your Podcast
How to Start a New Podcast Project
Click “New Project” on the dashboard and name your episode. You have the option to upload audio files or record directly. I often record directly in Adobe Podcast because it saves everything automatically. You’ll find this super convenient. You won’t lose your work thanks to autosave. It makes podcasting stress-free. Starting a project has never been easier.
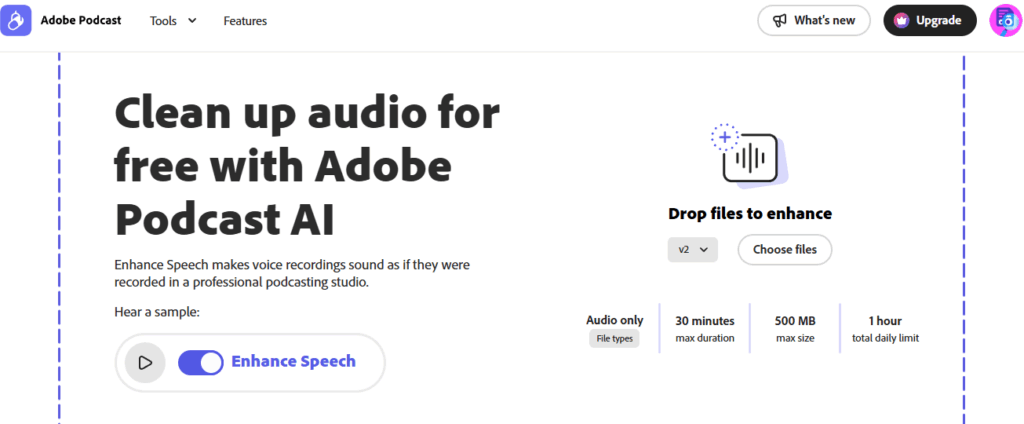
Using the Enhanced Speech Feature
Enhanced Speech is one of my favourite tools. Just upload your audio and Adobe cleans it up using AI. Your voice will sound clearer and background noise disappears. As a beginner, you’ll be amazed at how professional your recordings sound with just one click. This feature is a game-changer for low-budget setups. It feels like having a studio engineer. Your audience will hear the difference instantly.
Tips for Clear Audio Recording
Use a good-quality mic and record in a quiet place. Speak steadily and close to the mic. I always test my setup before recording. You should also avoid touching the mic or making sudden noises. The remainder will be handled by Adobe Podcast. Small adjustments lead to major improvements. Preparation is key. Your voice deserves to be heard clearly.
Editing Your Podcast
Tools Available in Adobe Podcast Studio
You’ll get tools like cut, trim, reorder, and more. Adobe Podcast lets you edit using text, which means you can highlight a word in the transcript and delete that part of the audio. I found this way faster than traditional editing. The tools feel modern and efficient. You don’t need technical experience. Editing becomes more creative and less frustrating.
How to Edit and Trim Audio Segments
To trim your audio, just use the text-based interface or audio timeline. I like how precise the controls are. You can cut out mistakes, long pauses, and filler words in seconds. You’ll feel like a pro editor without needing editing experience. Mistakes are easy to fix. The interface helps you move fast. You’ll spend more time creating and less time correcting.
Using Auto Transcription for Convenience
Adobe Podcast It will save you a great deal of time. find it saves a lot of time. Plus, you can edit the transcript like a Word document and the changes reflect in the audio. This is perfect for accessibility. It boosts your content’s reach. You can repurpose your podcast with ease.
Exporting and Publishing
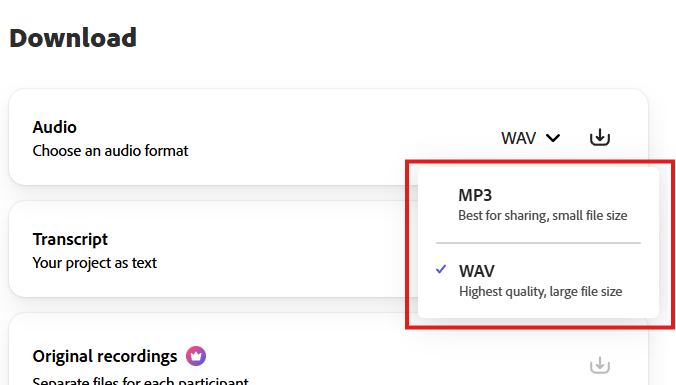
How to Export Your Podcast File
Once you’re done editing, click export. Select the audio quality and file type (MP3 or WAV). I usually export in high quality for best results. You can then save it on your device or cloud. The export process is simple and quick. You’ll get studio-quality output. File management becomes straightforward.
Sharing Your Podcast on Different Platforms
Adobe Podcast gives you a shareable link. I use it to embed episodes on websites and share them on social media. You can also upload your file to Spotify, Apple Podcasts, and Google Podcasts easily. Distribution becomes hassle-free. Adobe streamlines the process. More listeners means more growth.
Managing Files and Episode Titles
Keep your project organized with proper naming. I always add episode numbers and topics in the title. You should also tag keywords like “podcast editing,” “voice enhancement,” and “audio cleanup” for SEO. Naming makes future edits easier. You’ll thank yourself later. SEO tags boost your episode discoverability.
Best Practices for Adobe Podcast Users
Tips for Better Audio Quality
Use consistent mic placement, maintain speaking volume, and avoid background noise. I’ve improved my podcast quality just by following these basics. Adobe does the rest with AI tools like Enhanced Speech and a background noise remover. Simple habits lead to professional results. You’ll notice the improvement instantly. Quality always attracts loyal listeners.
Planning Your Podcast Episodes
Before recording, outline your episode. I write down key points to stay on track. You should decide whether you want a scripted or free-flow format. Adobe Podcast works well for both. Planning keeps your message clear. It helps reduce editing time. Organized episodes perform better.
Staying Consistent with Branding and Tone
Always use the same intro, outro, and music style. I make sure my tone and topics align with my audience. You’ll notice better listener retention when your podcast has a consistent vibe. Branding builds recognition. Consistency builds trust. Your podcast becomes part of your audience’s routine.
Conclusion
When it comes to creating audio material, Adobe Podcast is revolutionary. I’ve personally saved hours editing and improved my audio quality with zero technical effort. You’ll love how fast and easy it is to create pro-level podcasts. If you’re still using basic tools or struggling with editing, switch to Adobe Podcast now. Whether you’re a beginner or an expert, it has everything you need. I guarantee it’ll transform your workflow.
Start using Adobe Podcast today, experiment with its features, and grow your audience. The future of podcasting is smart, simple, and powerful — and Adobe Podcast leads the way
FAQs
1. What is Adobe Podcast, and how does it work?
Adobe Podcast is a browser-based tool for recording, editing, and enhancing podcasts. It utilises AI to clean audio and auto-transcribe content. No software installation is needed; just log in and start.
2. Is Adobe Podcast free to use?
Yes, Adobe Podcast offers free access to core features like Enhanced Speech and audio editing. A free Adobe account is required to get started. Some advanced features may be included in paid Adobe Creative Cloud plans in the future.
3. Can I record directly in Adobe Podcast?
Yes, you can record your podcast directly in the browser. It autosaves your progress and allows instant editing without third-party tools. Your recording appears in the dashboard immediately after saving.
4. How do I improve audio quality in Adobe Podcast?
Make use of a high-quality microphone and record in a peaceful setting. To improve voice clarity and eliminate background noise, turn on the Enhanced Speech option. This AI tool helps produce studio-quality sound effortlessly.
5. How do I share my podcast after editing?
After editing, export your file in MP3 or WAV format. You can upload it to platforms like Spotify, Apple Podcasts, and Google Podcasts. Adobe Podcast also provides a shareable link for easy distribution.